Preparing your fields for planting is a crucial aspect of successful crop production. Proper preparation ensures that crops receive the optimal conditions for growth, leading to healthier plants and better yields. This guide will walk you through the essential steps from soil testing to harvest, providing you with the knowledge needed to get the best results from your agricultural efforts.
Soil Testing: The Foundation of Crop Preparation
Why Soil Testing is Important
Soil testing is the first and most critical step in preparing your fields for planting. It provides valuable information about the soil’s nutrient levels, pH balance, and overall health. Understanding these factors helps you make informed decisions about fertilization, lime application, and soil amendments.
How to Conduct a Soil Test
- Collect Soil Samples: Gather soil samples from different areas of your field to get a representative sample. Use a clean, dry container and follow the guidelines provided by your local agricultural extension office or soil testing laboratory.
- Prepare the Samples: Remove any debris and mix the soil samples thoroughly. Allow the soil to air-dry before sending it to the lab for analysis.
- Send to a Lab: Submit your soil samples to a reputable soil testing laboratory. They will analyze the samples and provide you with a detailed report of the soil’s nutrient content and pH levels.
Interpreting Soil Test Results
The soil test report will include information about macronutrients (nitrogen, phosphorus, and potassium), micronutrients, pH levels, and soil texture. Use this information to determine the appropriate type and amount of fertilizer and soil amendments needed for optimal crop growth.
Preparing the Soil: Creating an Ideal Growing Environment
Soil Tillage: Breaking Up the Soil
Tillage is the process of breaking up and loosening the soil to improve its structure and drainage. This step helps to create a better seedbed for planting and allows roots to penetrate the soil more easily.
- Determine the Tillage Method: Choose between conventional tillage, reduced tillage, or no-till based on your soil conditions and crop requirements. Conventional tillage involves plowing and disking the soil, while reduced tillage minimizes disturbance. No-till maintains soil structure by planting directly into the existing crop residue.
- Perform Tillage: Use appropriate equipment such as a plow, disc harrow, or rototiller to prepare the soil. Ensure the soil is well-drained and free of large clumps or debris.
Soil Amendments: Enhancing Soil Fertility
Based on the results of your soil test, you may need to apply soil amendments to address nutrient deficiencies or pH imbalances.
- Fertilizers: Apply fertilizers according to the recommendations in your soil test report. Choose between synthetic or organic fertilizers based on your preferences and crop needs.
- Lime: If your soil test indicates that the pH is too low, apply lime to raise the pH to the optimal range for your crops. Follow the recommended application rates and timings.
- Organic Matter: Incorporate organic matter such as compost or aged manure to improve soil structure, water retention, and nutrient availability.
Planting: Setting the Stage for Growth
Selecting the Right Crops
Choosing the right crops for your soil and climate is essential for a successful harvest. Consider factors such as soil type, climate, and market demand when selecting crops. Consult with local agricultural experts or extension services for recommendations on the best crops for your area.
Planting Techniques
- Seed Selection: Choose high-quality seeds that are suited to your soil and climate conditions. Consider factors such as disease resistance, yield potential, and maturity time.
- Planting Depth and Spacing: Follow the recommended planting depth and spacing for your chosen crops. Proper planting depth ensures that seeds have adequate access to moisture and nutrients, while proper spacing allows for healthy plant growth and minimizes competition for resources.
- Planting Methods: Depending on the crop, you may use various planting methods such as direct seeding, transplanting seedlings, or using planting equipment. Ensure that planting is done at the right time to align with the growing season.
Crop Management: Nurturing Growth
Irrigation: Providing Adequate Water
Water is crucial for crop growth, and proper irrigation management is essential for maintaining optimal soil moisture levels.
- Irrigation Systems: Choose an appropriate irrigation system based on your crop’s needs and your field’s water availability. Options include drip irrigation, sprinkler systems, or surface irrigation.
- Watering Schedule: Develop a watering schedule that ensures consistent moisture without overwatering. Monitor soil moisture levels regularly and adjust irrigation as needed.
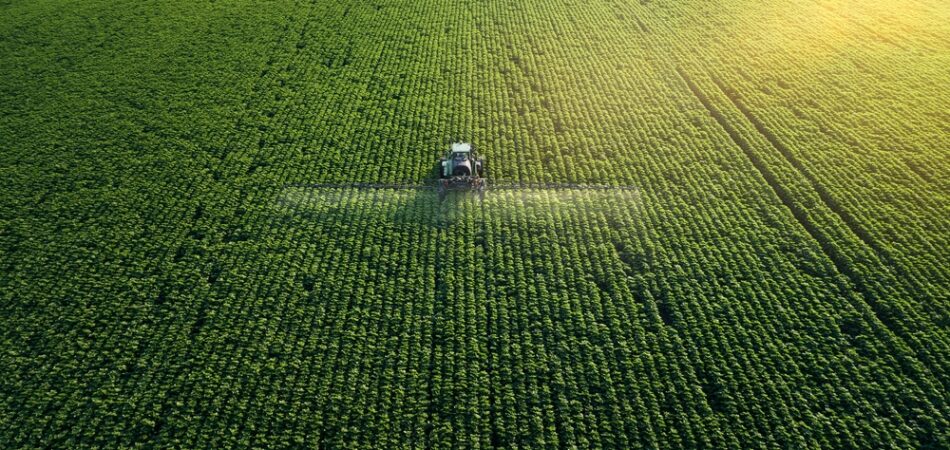
Weed and Pest Control: Protecting Your Crops
Weeds and pests can significantly impact crop health and yield. Implement a comprehensive weed and pest management plan to protect your crops.
- Weed Management: Use techniques such as mulching, mechanical weeding, or herbicide application to control weeds. Proper weed management reduces competition for nutrients and water.
- Pest Control: Monitor your crops for signs of pest infestation and use appropriate control methods. Options include integrated pest management (IPM) strategies, biological controls, or targeted pesticide application.
Fertilization: Supporting Growth
Continue to monitor soil nutrient levels throughout the growing season and apply additional fertilizers as needed. Adjust fertilization practices based on crop growth stages and nutrient requirements.
Harvesting: Reaping the Rewards
Timing the Harvest
Harvesting at the right time is crucial for maximizing crop yield and quality. Monitor your crops closely to determine the optimal harvest time based on maturity indicators such as color, size, and firmness.
- Harvest Indicators: Each crop has specific indicators of ripeness. For example, tomatoes should be harvested when they are fully colored and firm, while grains should be harvested when they reach the desired moisture content.
- Harvesting Methods: Use appropriate harvesting equipment and techniques for your crop. Options include hand harvesting, mechanical harvesters, or specialized equipment.
Post-Harvest Handling
Proper post-harvest handling is essential for maintaining crop quality and extending shelf life.
- Cleaning and Sorting: Remove any debris, dirt, or damaged produce. Sort crops based on size, quality, and grade.
- Storage: Store harvested crops in appropriate conditions to prevent spoilage. Use cool, dry, and well-ventilated storage areas for most crops.
- Transportation: Handle crops carefully during transportation to minimize damage. Use suitable containers and vehicles to ensure that crops arrive at their destination in good condition.
Conclusion
From soil testing to harvest, each step in crop preparation plays a vital role in ensuring a successful growing season. By following these guidelines, you can create an optimal environment for your crops, manage their growth effectively, and achieve a bountiful harvest. Whether you are a seasoned farmer or a beginner, understanding and implementing these practices will help you achieve better results and enjoy the fruits of your labor.
Need Soil Testing in Pasco, WA?
Founded in 1992, Custom Orchard Fumigation was created by farmers for farmers. We take great pride in providing soil fumigation services to farmers throughout the state. We can also help growers find other services to help in growing their crops. We also provide all paperwork for our services to ensure all regulations are met. Our founder, Chris Ford, has a background in Forest Management, and we are conscious of reducing the environmental impact on the soil and surrounding areas of your plot. Custom Orchard Fumigation invites you to visit our website or give us a call today!